Think about the last time you sat on the floor. Playing with a kid, looking under the bed, fixing something under the sink. Now think about getting back up. Easy? Or did you need the sofa, a groan and three attempts?
Getting up off the floor is one of those things you don't think about until you can't do it. And the day you really need it might be the day you slip in the kitchen.
Forget the internet tests where you have to stand up cross-legged with no hands to "prove your age". That's a party trick. What you need is a route that works for you, practised often enough that you remember it when it counts. Here is a five-step ladder to build it.
First: this is practice, not what to do after a real fall
After a real fall, don't jump straight up. Check yourself first: strong pain, bleeding, a hit to the head, a limb in a strange position, new weakness, chest pain or dizziness. If you might be hurt, can't put weight on a leg, or just feel wrong, call for help instead of forcing yourself up.
Don't practise alone if you recently fell, fainted or had surgery, have heart symptoms, bad vertigo, a fracture risk nobody has checked, or can't kneel comfortably. A physiotherapist can work out a different route with you.
Set up your practice spot
- Firm floor, not a slippery rug.
- A folded mat or thick towel next to a heavy sofa or chair that won't slide.
- Phone within reach. If someone is home, ask them to stand nearby, not to pull you up.
The three-point rule: before you change position, know where your three solid contacts are. Two feet and a hand. Or a foot, a knee and a hand. Move slowly so you notice where you lose control.
Step 1: chair control
Sit near the front of a firm chair, feet hip-width apart, stand up (use your hands if needed), then sit back down slowly, counting to three. Five reps.
The slow way down is the important part. If you drop into the chair, use a higher seat or more hand support. Next step when: you do five smooth reps without holding your breath or crashing down.
Step 2: down to one knee
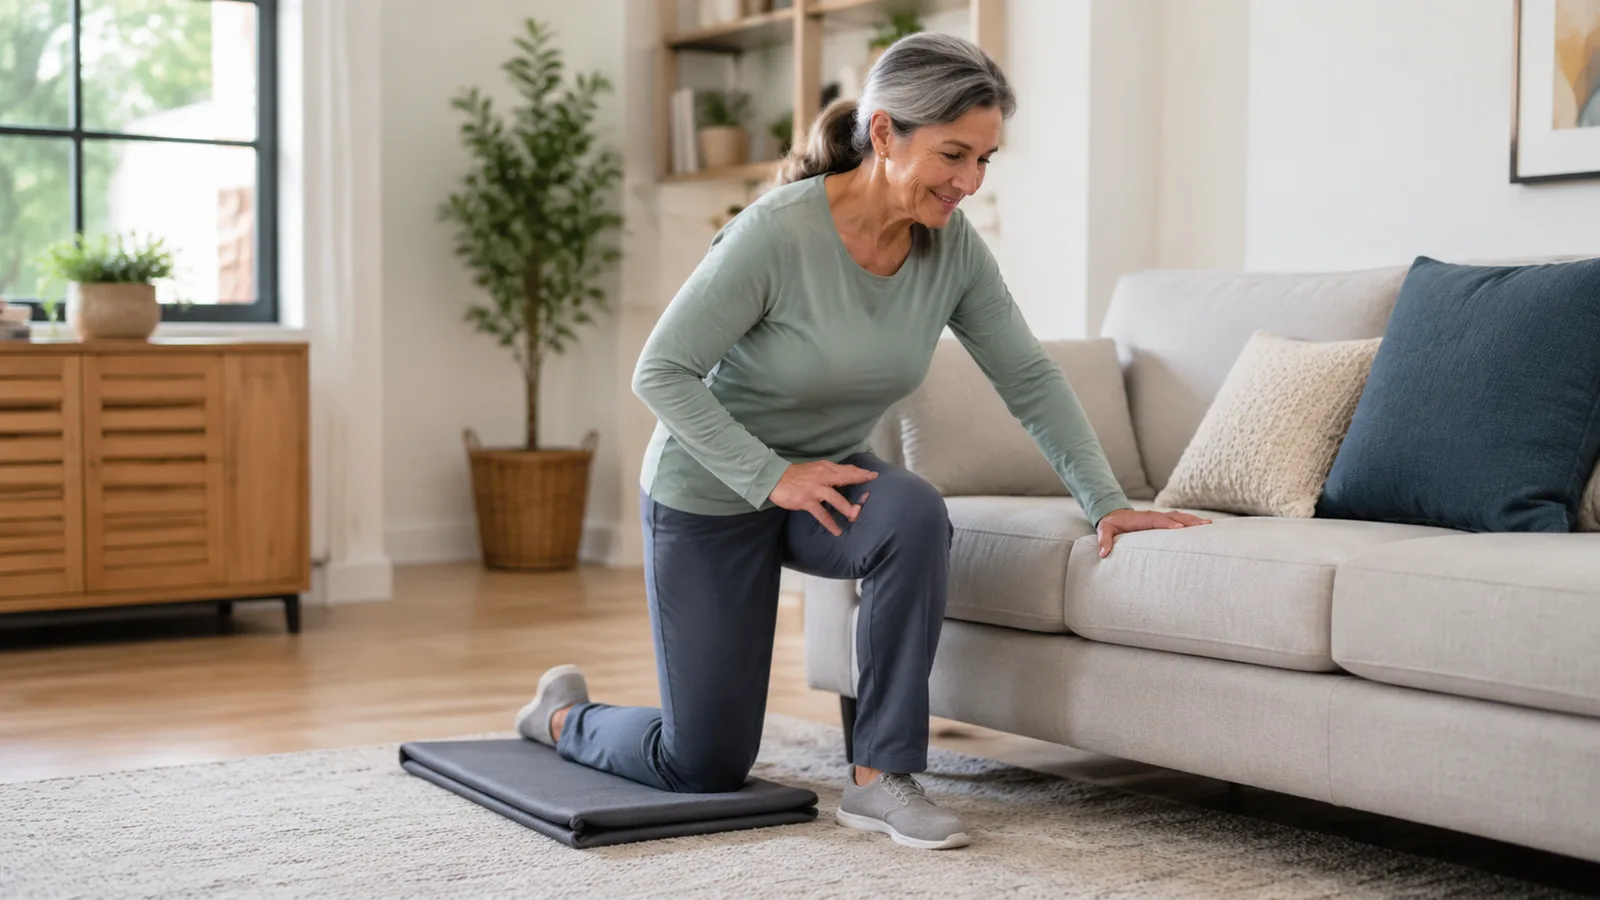
Hold the sofa with both hands, step one foot back and lower that knee onto the mat. The other foot stays flat in front. Then reverse: lean over the front foot, push through it and use the sofa to stand up.
Not comfortable on the knee? More cushion, shorter range. If kneeling is not OK for you at all, stay at step 1 and see a physio about a different route.
Step 3: both knees, then sit to the side
From one knee, bring the second knee down. Put a hand on the sofa, turn your hips and sit down on one side. Then go back exactly the same way: side-sit, hands on support, both knees, one foot forward, stand up.
What you are training is remembering the route. Most people have a side they prefer. One reliable side is worth more than two shaky ones.
Step 4: pause on the floor
Go down your route to sitting, stop, take two calm breaths. Then decide your three contacts and go back up. The pause teaches you to move with control instead of momentum.
One time down and up is enough. Not ten.
Step 5: less support, same safety
After several sessions where it feels easy, take away one thing: one hand instead of two, or a slightly lower support. Never take away the mat, the support and the helper all at once.
Using your hands is not failing. In real life you'll grab a chair, a stair or a bench. That's smart, not weak.
How often
Two or three times a week:
- two chair rises to warm up,
- your current step once,
- rest and check: any pain, dizziness or strange breathlessness?
- one more time only if the first felt controlled,
- two calm chair rises to finish.
That's it. Your regular strength training, like the home leg workout, builds the strength underneath. This keeps the skill.
Stop if you get sharp pain, chest pressure, new dizziness, sudden weakness or lose your balance more than your support can catch. And if getting up from a chair or the floor is suddenly much harder than before, get that checked rather than just training harder.